Countdown to NYE Number Maze

Tuesday, December 26, 2023

No comments

I'm back with another printable! This one is an easy countdown number maze, ideal for Preschoolers and Kindergarteners!


Have your child start at the ten, then follow the numbers in backward order until they get to 1! You can download the PDF for this quick activity at the link below.


Click here to download the Countdown to NYE Number Maze PDF!


Read More

Ornament Pritnable

Saturday, December 23, 2023

No comments

The weather outside is dreary, and we are looking for a way to pass the time at home. Something simple, that the kids can do by themselves. Bonus points if it's festive and works for multiple ages. If this sounds like you, I might just have what you need!


These scribble ornaments were easy to make, and Ro had a lot of fun designing them. To create this craft you will need the printable, which you can download below, something to color with, scissors, and maybe some string and tape.


Click here to download the Scribble Ornament PDF!


If you do end up creating some awesome ornaments, I would love to see them! You can tag me on instagram @hellowildthings.

Read More

My Birthday Wish List

Sunday, June 4, 2023

No comments

It's my birthday this month, so I thought I'd share a few things that I've had my eye on!


Fiction Wanderlust Tee from The Bookish Box and Shop

Starburst Backpack from madebyhank

Super Normal 2 Sneakers from MSCHF


The Go Go Work bag in Starburst from Ban.do makes me so happy! I just love bright bursts of color, especially when it's paired with black!

These corsets from April_Jean_Reflection are amazing! This Puma one is my favorite. The creator reworks hoodies into a corset and cropped hoodie combo and their attention to detail blows me away. The seams, the lacing, the silhouette, it's all perfection. Also, it looks like it might be the most comfortable corset on the planet. 

Selkie dresses are, in my opinion, the most romantic piece of clothing you can buy on the internet. Their Romance Novel dress is so breathtaking. It makes me want to hoard sheets and use 5 of them to make one beautiful and very twirly skirt.

Another piece of romantic clothing is this reversible swimsuit from Visual Mood. All of the pattern choices available are beautiful, but I specifically love that floral one.
Read More

DIY "Fuzzy" Dice

Wednesday, May 3, 2023

No comments


Don't you just hate that feeling when you take out your hot rod to park down at the milkshake shop with all of the other cool cats and realize that you forgot to buy fuzzy dice? Don't worry, daddy-o. I've got you covered.

For this craft, you're gonna need:
Thick Paper
Tissue Paper
Ribbon
A Glue Stick
Scissors
Tape

You will also need a dice template. You can search online, there are a ton of great options available, or you download one from my "Little Monsters Storytime and Activities" post!


Step one: Trace your dice template onto thick paper twice and cut them out. This isn't complicated, but make sure you don't cut the tabs off! You'll need them to put your boxes together.


Step two: Pre-fold the boxes so you know where all of your folds are. This will make it easier to put together the box after you have added the tissue paper.


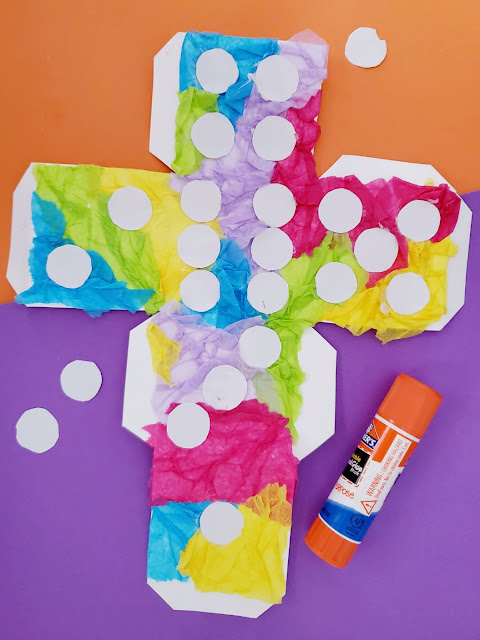
Step three: Glue on your tissue paper. In order to get the "fuzzy dice" effect you should crumple your tissue paper, put glue onto your die, then glue the paper on, being sure to NOT smooth out all of the lumps and bumps. For this craft, we love our lumps and bumps.


Step four: Cut out your dots. For one die you will need 21 dots, so you will need 42 in total for this project. I traced a dime to get the right size dots, but you might need to play around with the size depending on the size of your dice face. 


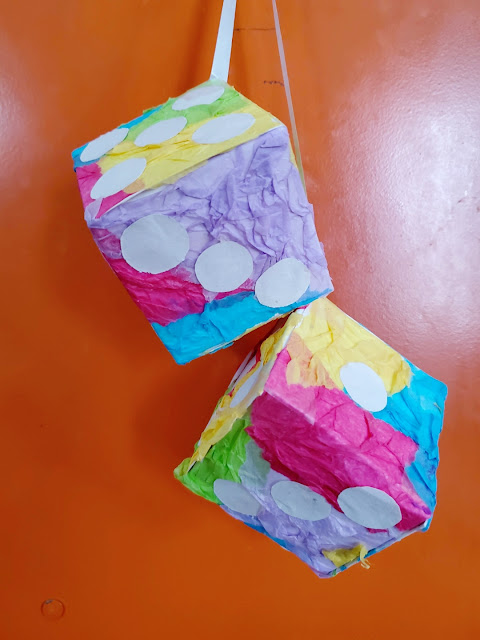
Step five: Glue on your dots. The secret to dice is that the opposite sides should always add up to 7. So, 1 is opposite of 6, 5 is opposite of 2, and 3 is opposite of 4. If you look at the picture above you should be able use it as a guide!


Step six: tape on your ribbon! Pick a corner and add your ribbon. Be sure to test that it attached well, because it will be hanging by this ribbon!

Step seven: Assemble your boxes. I am not going to lie, this is the worst part of this craft. Try to keep the tape inside as much as possible, and tape as close to the folds as you can. Don't lose hope, though. If you have to tape on the outside you can always cover it up with more tissue paper!


And that's it! You are now the proud owner of custom fuzzy dice. I always wanted a bright, colorful pair, so I added as many colors as I could. These are gonna look so good in my Eclipse. Or maybe my husband's Trans Am? Do you think he'd let me? Haha!

Read More

Rock Music Book Basket

Wednesday, April 26, 2023

No comments


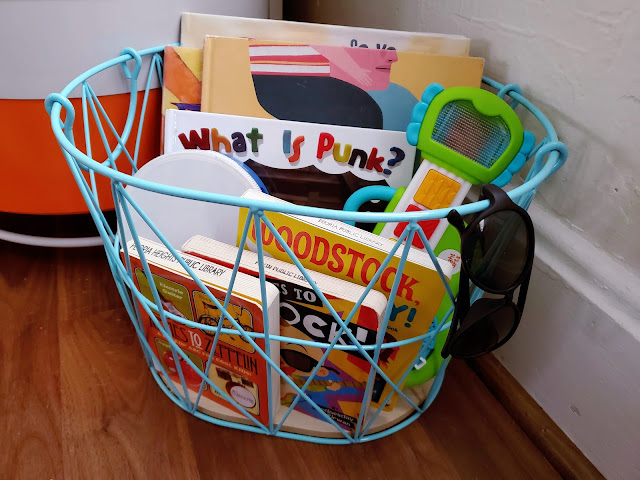
We are a rock music household. The kind that has amps in the basement and vintage vinyl on our shelves. So of course I wanted to introduce my kid to the world of rock as soon as possible. I made this book basket a while ago, when Ro was almost 2 (you can tell by the chubbiness of those adorable fingers that are trying to steal from one of the photos) and the books I picked were all SO cute.


In this basket:


 As for the activity, I think with any musical-themed basket the answer is obvious. Let them listen to music, or let them make music!

We loved Rockabye Baby! when Ro was younger. Rock music turned into lullabies? Yes, please!
Here is a baby guitar similar to the one pictured above! It's the Rock, Light, and Roll Guitar!

Linked below is a printable .pdf with the list of titles in this basket and some bonus bookmarks!
Read More

Lightning Puzzle

Wednesday, April 19, 2023

No comments


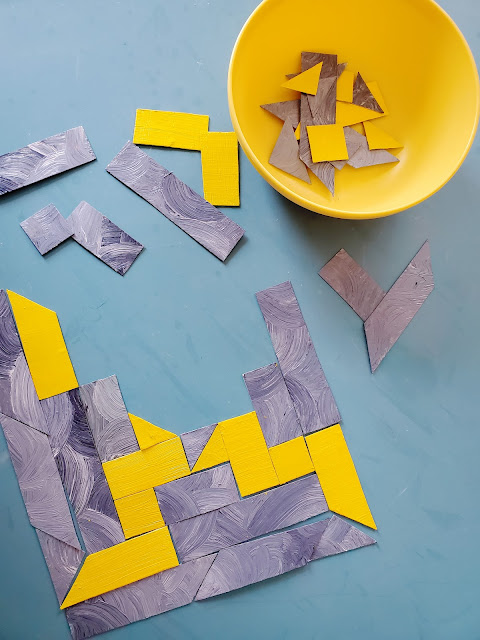
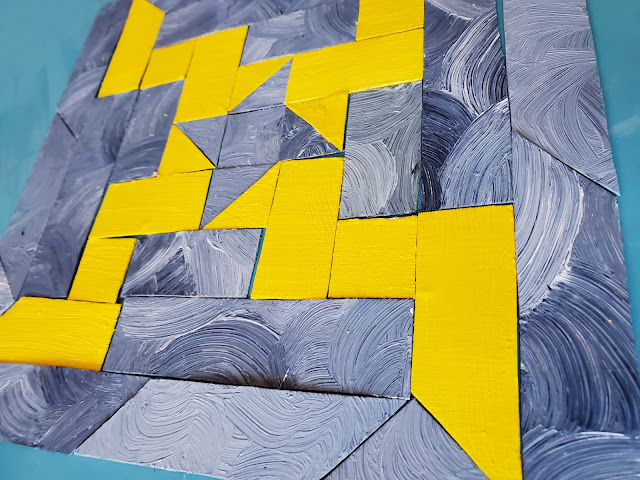
April in the Midwest is always full of storms. Clouds come rolling in, the skies rumble, and flashes of lightning streak across the expanse. The whole spectacle is as beautiful as it is dangerous. This puzzle tries to capture a stormy sky and keep it in one place for you to enjoy!


I had a lot of fun painting this one because of the swirliness I used for the clouds. Look at that texture! But if painting isn't your thing, there is a colored version in the template below, ready to be cut up and put together.

I'm going to warn you, this is one of the harder puzzles I've made. But it has lots of pieces that are exactly the same, so once you've completed one corner you've basically made the whole puzzle. Bonus points if you listen to Lightning Crashes by Live while you put it together, because that song has been in my head the whole time I've been writing this post.


Download the .PDF template here!

Read More

Northern Lights Book Basket

Wednesday, April 12, 2023

No comments


This world is astounding. I would even go so far as to say that are a few things on this planet that have been explained by science, but still might actually be magic. And the Northern Lights are definitely one of those phenomena. 


The books for this basket are some of the most beautifully illustrated ones I've shared. The colors are always deep and rich, as they should be. A lot of these books share the theme of seeking, and a journey with families, which I find comforting.


A Search for the Northern Lights by Elizabeth Rusch and Izzi Ruch, illustrated by Cedar Lee


Is your kid really into this theme and craving more? Here are a few activities I've found!


And I have a special surprise for you! From now on all Book Basket posts will include a printable book list! And some might have an extra surprise as well!


Read More

Checkerboard Beaded Bracelet

Wednesday, April 5, 2023

No comments


This craft reminds me of sleepovers with my friends and those lizard keychains we used to make out of beads. It also reminds me of those sweatband cuffs everyone was wearing when I was in high school. Why? Were our wrists sweaty?

Supplies: 

Pony Beads
Embroidery Floss, or Stretchy Thread
Scissors
Tape (optional)


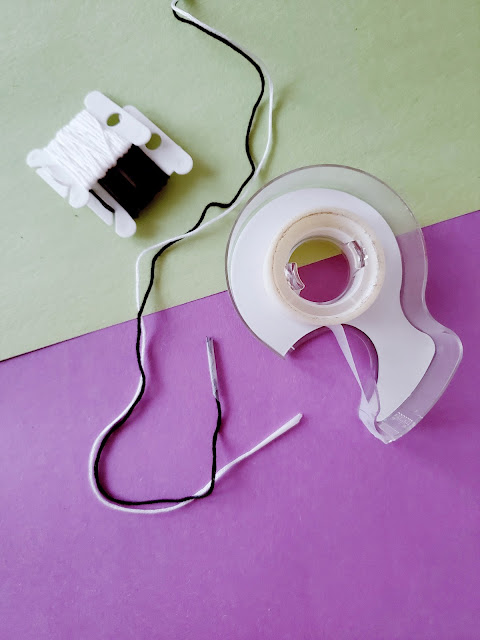
Step One: Prep your string. Always cut more than you need because you can trim it off easily. For this craft, you will only need 2 strings.  I would cut at least 2 feet of each. Tie your knot at least 3 inches down so you have plenty of room to tie the knot when you put it on.
One more thing that's kinda finicky but well worth it: wrapping tape around the end of your string. This offers some stabilization that makes it much easier to bead with. 

Before you start, make sure you have a surface to work on and your beads readily available. This project could go wrong very quickly, so try to set yourself up for the least amount of chaos possible!


Step Two: Start adding beads! You'll start with just one bead. Thread one side through one end and pull it out the other. Then thread your second thread through the hole your first thread just came out of. (So, if you follow the pictures, I put the black thread through one side, and put the white thread through the opposite side.) Congratulations! If you've successfully completed that step, you should be able to do the rest of the craft, no sweat. 

Your next row of beads should be two beads across. Put your thread through both beads one way, then put your second thread through both beads the other way. The next row will have three beads, and then you will keep making three bead rows until you have the length of bracelet you want. Try to pull your strings as tight as possible after every row.

If you want to make the checkerboard pattern like I did, string on three beads with the b-w-b pattern, thread the other string through to complete the row, then string on another three with the w-b-w pattern, and complete that row. Continue this pattern until you are close to the length desired.

If you want to make a bracelet with a word in the middle, your pattern will be color bead, then letter bead in the middle, then color bead. I like to add a few rows of just color at the beginning and end.


Step Three: Finish it off! Once you have your bracelet the length you want you are going to add two more rows. The first will just be 2 beads, and the last will be 1 bead. Then pull your strings tight and tie a knot.


The cool thing about this craft is that if you elevated the materials a bit you could create an accessory that could be worn by an adult easily. Fancier beads (or not, I think straws could look cool) and a nicer cording... the idea is in there somewhere, I swear! 


Happy beading! I can't wait to see what other people create!

Read More

10 Things: January 2023

Sunday, January 8, 2023

No comments

 I have been doing these 10 Things posts so long that I've decided I need to start adding dates to the titles. For my own sanity and organization, really.


1: Suck It Up glass straw set by Misha Kahn

2: Suspish Inn hoodie from Bailey Sarian

3: Winterset Sherpa Checkboard Jacket from Vans

4: Pink Clay and Turmeric Scalloped Placemats and Napkins from Bed Threads

5: Cicada Seltzer Koozie from Haptic Lab


I've been looking for a good "poppers" DIY for a few years now and this one from Conservamom is just what I wanted.


The Sunnylife line of well-designed games has me drooling.


I've been looking for a container for my Magic cards, and the Squire from Gamegenic is so simple and sleek, but genius in the ways it can be transformed.


Sometimes I just see something that is tiny and fuzzy and cute and I kind of need it. This Snowflake Dragonfly Mini from Slumberkins is one of those things. I think I might just need to start a fuzzy squishy bug collection.


I feel like I'm cheating a little bit for my last link, but I have been super into updating my Instagram lately. There is a ton of stuff on there that you won't find on this blog! You can check it out @hellowildthings!


Read More

2022 Bullet Journal Round Up

Sunday, January 1, 2023

No comments

It has been a while. Like, a long while. When I wrote my last post, I didn't realize I would be taking a year-long break. But my family was in the middle of something life-changingly difficult, and I realized that I just couldn't balance everything. Some things had to be put on the back burner. And that was okay. Because now we've made it out to the other side, and things are good. And then some.


One thing I was able to keep up with, no, NEEDED to keep up with, was my bullet journals. I can't describe the amount of chaos these things help me sort through. And that's just for my own brain, let alone organizing an entire family. I use them for lists, planning, ideas, scheduling, finance tracking... everything.


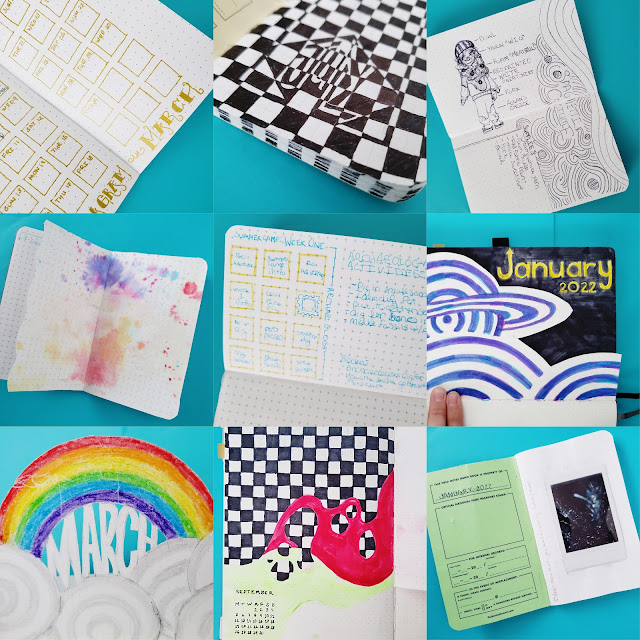
For the past couple of years, I've kept more than one notebook. One, my Field Notes, goes with me everywhere. It is my base notebook, and I change it out on the first of every month. This thing is my organization hub. Every month gets a calendar and a loose theme, and sometimes a "font" if I'm feeling up to it. I have "weekly meetings" with myself where I create a landing page for the week where I write out our schedule, important things that need to be done, and sometimes a goal. I also keep my lists in this notebook. To-do lists, reading lists, supply lists, lesson plans, etc. It all sounds very organized, but every other page is filled with doodles and ideas and chaos. If I'm really on top of it I'll keep my index in order and it becomes a little guidebook to my life.


The other notebook is where bigger ideas are given space to exist. This is where I do my big monthly header images, like the ones you see above. This notebook is more free-form, and usually just lives at my home. I use it to plan out big projects, often ones that span over a few months. I have found that it's nice to have an over-arching notebook because ideas don't always get transferred between the monthly ones.


I discovered a few new things about my journaling needs this year. You'd think after 5 years I'd have a standard system,  but I've found that my organization needs are always evolving. For example, this year I did a few Instagram-focused projects that used graphics and photos to communicate my ideas. I found that the easiest way for me to visualize and plan this was to actually draw out a grid in my notebook and then write what the posts would be within the grid, with notes to the side (the middle image is the best example). This helped me picture what it would actually look like when published. 


I've already got my first notebook of 2023 ready to go, and I'm interested to see how my journaling will change this year. A lot more social media, because... well you'll see in a second, if you keep reading.


The most exciting news of our year is that our family has accomplished a dream that we have been talking about since before we got married: we are now the proud owners of Sword and Board Game Store. It's in a historic building in our beautiful downtown, and I love it there. It's decorated with the historic nature of the building kept in mind, and it has plenty of space to play the vintage board games we have lying around.  We sell board games, both classic and new, Dungeons and Dragons equipment, Magic the Gathering and other card-collecting games, plus a variety of other table top entertainment stuff. It is a small slice of hobby heaven in our tiny town. You can check it out at our website: swoardandboardhavana.com or follow us on Instagram @swordandboardgamestore


Read More
Related Posts Plugin for WordPress, Blogger...
Copyright © Hello, Wild Things. Blog Design by SkyandStars.co